Easy integrations with Textile Thread streams
Update: some of the methods below are out of date. For a good overview of the latest and greatest methods, be sure to read the Tour of Textile.
Plus some command line fun!
Last week we introduced some features of Textile’s new IPFS File
Loader (name to be decided). These new features make it exceedingly easy to create complex workflows that lead to storing structured data on IPFS. We’ve also been having a tone of fun building demos, and keep coming up with cool ideas and fun ways to integrate Textile, Threads, and IPFS. Some of our favorites include sending (fake) logs to IPFS through a Textile Thread using a JSON schema:
Pushing some fake logs to @IPFSbot via @Textile01 schemas: "flog -n 1 -f rfc3164 | tee log.ndjson | textile add -t 12D3KooWLDnGHuACZG9k2M3AMJ3YnsrzBPcN5b4o4X4sC46Mzymq -v". Bottom left node receiving, syncing to middle node, both using right node for backup / offline messaging. pic.twitter.com/L8SqXfcKYt
— Sander Pick (@sanderpick) November 29, 2018
As well as pushing weather updates to peers within a shared Thread using the command line (and this schema):
while sleep 5; do weather --json | jq '{alerts, currently, code, error, flags, latitude, longitude, offset, timezone}' | textile add -t 12Dblah...; doneBut adding data to Threads is just part of the puzzle. We’ve also implemented tools to get data out. So in this quick and dirty post, we’ll show you how to use our subscribe (sub) API to stream Textile Threads updates to external tools, such as Slack… or Twitter or wherever else you might want to send them.
Background
If you read our last post, you’ll know that we recently released a new version of our textile-go library that supports reusable workflows to ingest, process, encrypt, host and consume data on IPFS from any device running a Textile peer. The whole system is based around the concept of schemas (which are used to define how data is processed and its storage structure) and Threads (which we’ve written about already). Along the way, we’ve added a bunch more useful APIs and tools to make it easier to get things in and out of Threads/IPFS. One such tool, is our Thread subscription API, which allows external tools to subscribe to real-time Thread updates!
To show you what this looks like, we’ll build on Sander’s examples from last week, where he added various photos of horses to a Thread to share with another peer. Our distributed team uses Slack to communicate, so this time around, we’ll share those updates with an internal Slack channel!
Setup
We’ll start by setting up our local Textile peer. You can follow the setup steps from our previous post, and then the actual Textile setup amounts to initializing a wallet:
textile wallet initApplying those credentials (you’ll need SECRET SEED) to initialize a new ‘account’:
textile init --seed=<copied secret seed>And then firing up a Textile daemon:
textile daemonEasy! Now we’ll simply open up a new console/terminal, create a new --open ‘horses’ (or whatever you like) Thread with the default --photos schema, and begin crafting our Slack integration:
textile threads new horses --open --photosOnce you’ve created that Thread, make note of the id for later…
Crafting
Setup
So first things first, if we’re going to try to integrate Textile with Slack, we’ll need to setup our Slack incoming Webhook. From the Slack docs, you’ll see that “incoming Webhooks are a simple way to post messages from apps into Slack. Creating an Incoming Webhook gives you a unique URL to which you send a JSON payload with the message text and some options.”
Its really easy to get setup, just follow the directions in their ‘getting started’ docs by…
- Creating a Slack app,
- Enabling Incoming Webhooks,
- Creating an Incoming Webhook, and finally
- Using your Incoming Webhook to post pictures of horses!
With that setup done, your Webhook url will look something like this:
https://hooks.slack.com/services/T00000000/B00000000/XXXXXXXXXXXXXXXXXXXXXXXXand we’ll be making HTTP POST requests like this:
POST https://hooks.slack.com/services/T00000000/B00000000/XXXXXXXXXXXXXXXXXXXXXXXX
Content-type: application/json
{
 "text": "Hello from Textile!"
}
We’ll use curl to post to that Webhook, and the only other tool you’ll need is jq (which you might have noticed in the weather example above). jq is a super nice, lightweight, and flexible command-line JSON processor, which has been described as sed for JSON data. We’ll use jq to process our textile command line output, and prepare it for posting to Slack. Other than that, the whole thing is just pretty simple unix style command piping.
Command line
We’ll start with some variables to make things easier for us later:
THREAD_ID="<thread-id from earlier>"
GATEWAY_ADDRESS="http://blah.ngrok.io"
CHANNEL="my-channel"
HOOK_URL="https://hooks.slack.com/services/..."
Hopefully these are pretty obvious, the THREAD_ID is the id from the Thread we created earlier, the GATEWAY_ADDRESS is the address of our peer’s decrypting gateway, and the CHANNEL AND HOOK_URL are the slack channel you want to post to, and the Webhook url we just created.
You’ll noticed I’ve used ngrok for the GATEWAY_ADDRESS. This is simply for testing/demo purposes because it provides a nice, accessible public url to test with. Setup is super easy, and you can play around with this example in no time. With that in mind, you obviously shouldn’t use this in a production setup! But here’s a super quick setup to get you going:
- Download ngrok for your platform,
- Unzip to install and move it somewhere useful (you can even keep it local to this little project),
- Use the simple command line tool to connect your account (./ngrok authtoken blah…), and
- Fire it up (we’ll use ./ngrok http 5050)!
Processing
The output from our textile sub command is going to look something like this:
{
    "block": {
        "id": "blah",
        "thread_id": "blah",
        "author_id": "blah",
        "username": "2xVHoan",
        "type": "FILES",
        "date": "2018-12-03T23:08:03.788433Z",
        "parents": [
            "blah"
        ],
        "target": "blah",
        "body": "hoot"
    },
    "thread_id": "blah",
    "thread_name": "horses",
    "info": {
        "author_id": "blah",
        "block": "blah",
        "caption": "caption text!",
        "comments": [],
        "date": "2018-12-03T15:08:03-08:00",
        "files": [
            {
                "index": 0,
                "links": {
                    "exif": {
                        ...
                    },
                    "large": {
                        ...
                    },
                    "medium": {
                        ...
                    },
                    "raw": {
                        ...
                    },
                    "small": {
                        ...
                    },
                    "thumb": {
                        ...
                    }
                }
            }
        ],
        "likes": [],
        "target": "blah",
        "threads": [
            "blah"
        ]
    }
}
So we need to craft a jq processing pipeline that takes that as input, and outputs something like this for our Slack API endpoint:
{
    "channel": "general",
    "text": "added a file to thread: cli_tests",
    "username": "2xVHoan",
    "icon_url": "https://icon-url.png",
    "attachments": [
        {
            "author_name": "Textile Photos",
            "author_link": "https://textile.photos/",
            "author_icon": "https://icon-url.png",
            "fallback": "Photo posted from the Textile Photos app.",
            "image_url": "http://blah.ngrok.io/ipfs/blah?key=blah",
            "text": "hoot",
            "title_link": "http://blah.ngrok.io/ipfs/blah?key=blah"
        }
    ]
}
To keep things simple, we’ll just setup most of the JSON in the jq filter syntax, but there are obviously nicer ways you could set this up:
jq -c --unbuffered --arg gateway_address "$GATEWAY_ADDRESS" --arg channel "$CHANNEL" \
'select(.block.type == "FILES") |
.info.files[].links.large as $large |
($gateway_address+"/ipfs/"+$large.hash+"?key="+$large.key) as $url |
{
    channel: $channel,
    text: ("added a file to thread: " + .thread_name),
    username: .block.username,
    icon_url: "https://ipfs.io/ipfs/<your icon here>.png",
    attachments: [
      {
        author_name: "Textile Photos",
        author_link: "https://textile.photos/",
        author_icon: "https://textile.photos/statics/images/favicon/favicon-32x32.png",
        fallback: "A photo posted from the Textile Photos app.",
        image_url: $url,
        text: .info.caption
      }
    ]
}'
So what this is doing is…
- Not buffering (--unbuffered) the output, so each new Thread post will cause jq to process and output the JSON data,
- Compressing (-c) the output so the whole JSON doc is on one line,
- Specifying two variables ($GATEWAY_ADDRESS and $CHANNEL) from our environment,
- Selecting only "FILES"-based Thread updates,
- Creating some internal jq variables ($large and $url) for easier reading, and finally
- Setting up the output JSON structure…
That’s a relatively complex jq pipeline, so I encourage you to read up on jq filters etc… but the above should be enough to get you going 😃.
Posting
The curl side of things is relatively simple in comparison! All we need to do is POST our JSON data to the Slack Webhook url. Buuuut, since we’re ‘streaming’ our textile sub outputs through jq, we’ll need to process the outputs one line at a time to send to curl. This is really easy to do with a basic bash while loop:
while read -r LINE;
  do curl -s -d "payload=$LINE" $HOOK_URL;
done
See, that was easy. What this does is processes each newline delimited output from jq, and POSTs the JSON as the payload to our Webhook url. Without the while loop, curl wouldn’t know when to actually POST our request, and the command would just hang…
Pipeline
Ok, so with these bits and pieces in place, we can now simply pipe one command to the next, to create the following pipe line:
textile stuff | jq stuff | curl stuffWhich could look something like this (you can use the echo "$LINE" instead of the curl call for testing):
textile sub -t $THREAD_ID \
| jq -c --unbuffered --arg gateway_address "$GATEWAY_ADDRESS" --arg channel "$CHANNEL" \
'select(.block.type == "FILES") |
.info.files[].links.large as $large |
($gateway_address+"/ipfs/"+$large.hash+"?key="+$large.key) as $url |
{
    channel: $channel,
    text: ("added a file to thread: " + .thread_name),
    username: .block.username,
    icon_url: "https://ipfs.io/ipfs/<your icon here>.png",
    attachments: [
      {
        author_name: "Textile Photos",
        author_link: "https://textile.photos/",
        author_icon: "https://textile.photos/statics/images/favicon/favicon-32x32.png",
        fallback: "A photo posted from the Textile Photos app.",
        image_url: $url,
        text: .info.caption
      }
    ]
}' \
| while read -r LINE;
    do curl -s -d "payload=$LINE" $HOK_URL; # echo "$LINE"
  done
If you really want to get creative, you can wrap this whole thing up in a custom command line tool, so you could call it like this:
$ tex2slack --help
Stream Textile Photos updates to Slack
Usage: tex2slack [-u|--gateway-url <arg>] [-s|--hook-url <arg>] [-t|--thread-id <arg>] [-c|--channel <arg>] [-v|--version] [-h|--help]
 -u,--gateway-url: Base gateway url (no default)
 -s,--hook-url: Slack hook url (no default)
 -t,--thread-id: Thread id (no default)
 -c,--channel: Channel name (default: 'general')
 -v,--version: Prints version
 -h,--help: Prints help
We used Argbash to wrap the above command pipeline into a quick and dirty tool, just for fun. You can grab it from here if you want to try it out or play around with the above example.
Testing it out
The last step left is to test it out! You can do this by starting up your bash script or running it as a pipeline, then in another terminal, you can add some photos to the Thread:
textile add horses -t <thread-id> --caption='demo time!'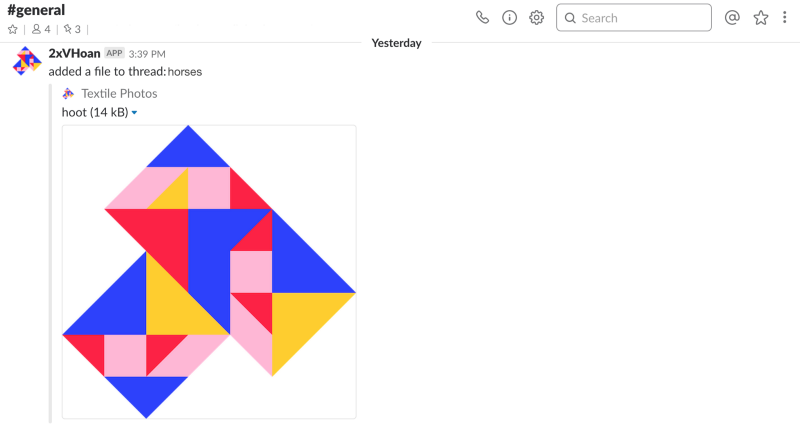
And that’s all well and good, but really, you’re just subscribing to your own updates. To make this demo really fun, you’ll want to invite another peer to the Thread, and have them post some photos!
So let’s create a new peer (you might want to wallet init a new seed) and start them up:
textile init --seed=blah --repo-dir=.textile2/ -a 127.0.0.1:40601
textile daemon --repo-dir=.textile2/
Then invite them using your original peer:
textile invites create -t <thread-id> -p <peer-id>They’ll have to accept the invite (watch as they import the previously added photos!), and then you can have them add a photo or two:
textile invites accept <invite-id> --api=http://127.0.0.1:40601
textile add yeehaw.jpeg -t <thread-id> --caption="yeehaw" --api=http://127.0.0.1:40601
Done!
That’s it, all done! We hope you enjoyed this quick n’ dirty tutorial. We’re going to continue to publish more of these as we continue to roll out our new APIs and tools, so do let us know what you think! You can reach out over Twitter or Slack, or pull us aside the next time you see us at a conference or event. We’re happy to provide background, thoughts, and details on where we’re taking this work. In the mean time, don’t forget to check out our GitHub repos for code and PRs that showcase our current and old implementations. We try to make sure all our development happens out in the open, so you can see things as they develop. Additionally, don’t miss out on signing up for our waitlist, where you can get early access to Textile Photos, the beautiful mobile interface to Textile’s Threads and underlying APIs.