
Tutorial: Setting up an IPFS peer, part II
How to set up a reverse proxy with NGINX and IPFS to support secure connections with browser ĐApps
Today we’re going to build on our previous post about quickly (and inexpensively) spinning up an AWS EC2 IPFS peer by extending our setup to support secure p2p connections with browser-based (js-ipfs)peers over WebSockets. If that sounds like a bit of a mouthfull to you, then you are in good hands. We’ll take a step-by-step approach to getting things set up. So, before we move on, please check out our previous post, and make sure you are comfortable with setting up an AWS EC2 instance running go-ipfs before moving on. Note that you’ll likely need to open up ports 90 and 443 on your EC2 instance before moving on.
But first… why do we want to go to all this trouble in the first place? You don’t need to do any of this to simply run a normal go-ipfs peer. In fact, if you followed our previous tutorial, you already have one going! But, if you want to run a secure gateway, or want to be able to connect to browser-based peers (like those running ĐApps), then these steps are neccessary. By using secure protocols, we ensure traffic between your peer and browser-based peers is encrypted and private. Also, the WebCrypto API used by js-ipfs in the browser requires a secure origin, so it is useful to have a secure gateway for accessing them. But don’t take our word for it! We encourage you to read up on web security and learn for yourself why securing your web-traffic is important for a safer web experience.
Setting up our server
Now that we’re all on the same page, the only other thing you’ll need is a domain name to which you have admin access (or that you can get someone else to administer for you). If you don’t have a domain name to work with, you will have to a) get one (which can be done relatively inexpensively), or b) skip the secure connection stuff (though that’s kinda the whole point of this particular tutorial).
So the first step to enabling secure websocket connections to an IPFS peer node is to run all connections through a reverse proxy server. There is an existing tutorial that goes through some of these steps, and which provided some of the inspiration for this post. Nginx is one of the most popular web servers in the world and is responsible for hosting some of the largest and highest-traffic sites on the internet. It can be used as a web server or reverse proxy, and is well-supported on most operating systems. So let’s use it!
Much of the initial Nginx setup comes from this excellent tutorial from DigitalOcean. As in our previous post, unless otherwise stated, the following commands should all be entered into your Terminal, after having ssh’d into your EC2 instance. If that previous sentence sounds like gibberish, go back and read Tutorial Part I.
Nginx is available in Ubuntu’s default repositories, so the installation is straightforward:
sudo apt-get update
sudo apt-get install nginx
Now let’s check our server, which should already be up and running after initial install:
systemctl status nginxIf all is well, you should get some output that starts with something like:
● nginx.service - A high performance web server and a reverse proxy server
   Loaded: loaded (/lib/systemd/system/nginx.service; enabled; vendor preset: enabled)
   Active: active (running) since Mon xxxx-xx-xx xx:xx:xx UTC; xxxxx ago
Now for the real test: grab the Public DNS (IPv4) name for your instance (see our previous tutorial) and enter that into your browser’s address bar (http://ec2–xx–xxx–x–xx.us-xxxx-2.compute.amazonaws.com), you should see the default Nginx landing page, which looks something like this:
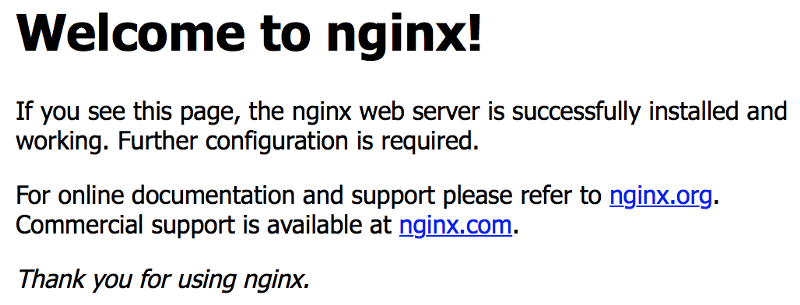
You can now do things like stop, start, and restart your server, as well as reload your configuration settings (more on this in a bit), or enable your server to start on reboot (which is a good idea, since your IPFS peer already does this). You do any of these things by using the following command (replace {cmd} with stop or start etc):
sudo systemctl {cmd} nginxThere’s lots more information at that DigitalOcean link, so feel free to check it out. In the mean time, let’s make sure our custom domain name is pointing to the right place before we start setting up our secure reverse proxy server.
Setting up a sub-domain
Ok, so you might be wondering at this stage: “why do I need a custom domain name to use IPFS?” And the answer is, you don’t! You only need one if you want to support secure TLS connections. “Ok, but why do I need a domain name to support secure TLS connections?” Another good question! Because we need to be able to prove that we control the instance for which we want a browser-trusted certificate. The easiest way to do that is to point our domain name to our instance, and have the Let’s Encrypt CA look at the domain name being requested and issue one or more sets of challenges. It’s a complicated process under the hood, so we encourage to you check out the Let’s Encrypt website for more details.
If you already have access to a custom domain name, great. Otherwise, you could create a random domain name, and then register it with someone like GoDaddy. Chances are, if it really is just a random string of characters, it’ll be cheap. Ok, so I registered a domain name with GoDaddy ages ago for my personal blog, so I’m going to add a sub-domain that points to my EC2 instance for which I’ll request an SSL cert (more on that in a moment). Whichever domain-name registrar you use, they should have facilities to edit CNAME records. You’ll want to add a subdomain that points to a server name. For GoDaddy, this looks something like this:
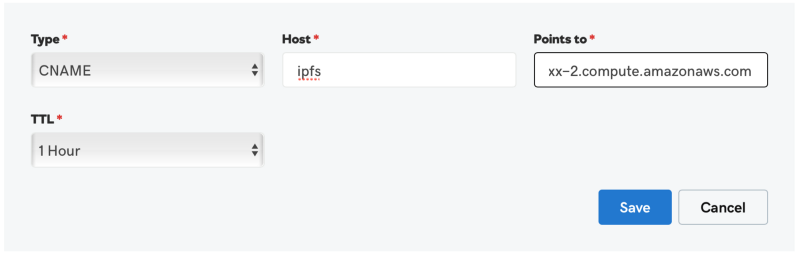
You should be able to test that things are working by typing the above subdomain (ipfs.my-domain-name.com) into your browser’s address bar. If you see the same Nginx ‘welcome’ message as above, things are working!
Now let’s add some configuration options to our Nginx setup so that we can super-power our IPFS peer and serve something more interesting than a welcome page.
Secure Gateway and Websockets
Now that we have our custom domain setup and pointing to the right place (or EC2 instance), we need to enable HTTPS on our Nginx server. We’re going to use Let’s Encrypt — a free, automated, and open Certificate Authority — to do this. Let’s Encrypt is an awesome project that is providing a great service to the web community. They make it fast and easy to enable HTTPS (SSL/TLS) for websites, for free, in the most user-friendly way possible.
In order to make using Let’s Encrypt even easier, we’re going to automagically enable HTTPS on our server with Electronic Frontier Foundation’s (EFF) Certbot tool. Certbot provides a nice set of dropdown menu options to select exactly the right setup for your system and server. We’re using Nginx on Ubuntu 16.04 (xenial) for this tutorial, so go ahead and select that configuration. Next, just follow the instructions (which I’m reproducing below), and don’t forget to read up on automatic renewal and all those nice things while you’re there.
sudo apt-get update
sudo apt-get install software-properties-common
sudo add-apt-repository ppa:certbot/certbot
sudo apt-get update
sudo apt-get install python-certbot-nginx
Certbot has an Nginx plugin that works on Ubuntu, which makes it insanely easy to get things setup. Running the following command will get a certificate for you and have Certbot edit your Nginx configuration automatically:
sudo certbot --nginx -d ipfs.my-domain-name.comThis will start an interactive shell prompt that will guide you through the minimal steps required to a) obtain a certificate, b) configure your Nginx server, and c) redirect all traffic to HTTPS. When it asks you to please choose whether or not to redirect HTTP traffic to HTTPS, select option 2 which enables redirecting. If all goes well, you should see a congratulatory message and a link for testing your configuration. You can also test things in your browser by visiting your subdomain, prefaced with https: https://ipfs.my-domain-name.com.
Configuring secure connections
Now comes the slightly tricky part. We are going to customize our Nginx reverse proxy configuration to connect to our underlying IPFS peer addresses. We’ll start with our gateway (if you enabled this), and add WebSocket support so that browser peers can connect to our peer.
Open your configuration file located at /etc/nginx/sites-available/default using your favorite terminal editor. nano is a good choice if you don't have a favorite, though Ubuntu comes with several options (I use vim). If you scroll down to the bottom of the file, you’ll see several lines that have a comment # managed by Certbot added to them. These are the main pieces that enable TLS/SSL support. We’ll first focus on the last two server entries (I’ve removed extraneous comments for brevity).
server {
  root /var/www/html;
  server_name ipfs.my-domain-name.com; # managed by Certbot

  location / {
      # First attempt to serve request as file, then
      # as directory, then fall back to displaying a 404.
      try_files $uri $uri/ =
    }

listen [::]:443 ssl ipv6only=on; # managed by Certbot
  listen 443 ssl; # managed by Certbot
  ssl_certificate /etc/letsencrypt/live/ipfs.my-domain-name.com/fullchain.pem; # managed by Certbot
  ssl_certificate_key /etc/letsencrypt/live/ipfs.my-domain-name.com/privkey.pem; # managed by Certbot
  include /etc/letsencrypt/options-ssl-nginx.conf; # managed by Certbot
  ssl_dhparam /etc/letsencrypt/ssl-dhparams.pem; # managed by Certbot
}

server {
 if ($host = ipfs.my-domain-name.com) {
   return 301 https://$host$request_uri;
 } # managed by Certbot

 listen 80 ;
 listen [::]:80 ;
 server_name ipfs.my-domain-name.com;
 return 404; # managed by Certbot
}
The first server entry above is what is serving up that welcome page. All the lines with the # managed by Certbot comment are setting up the TLS/SSL certificate information so that your server knows how to securely connect with any clients connecting to it. We’re going to delete theroot entry in this section and change the location entry to point to our gateway (if you enabled this in the previous tutorial, otherwise, you can just delete this entry). The location entry should now look something like this:
location / {
    proxy_pass http://127.0.0.1:8080;
    proxy_set_header Host $host;
    proxy_cache_bypass $http_upgrade;
  }
The second server entry above simply permanently (301) redirects port 80 traffic to port 443, and defaults to 404 otherwise. These numbers are HTTP codes, which you can lookup for reference. We aren’t going to touch this entry at all.
Now comes the fun part, redirecting secure connections over port 4002 to plain old traffic on port 8081, which will be the home of our websocket p2p connections (IPFS doesn’t support secure connections by default, which is why we’re doing this in the first place). Why 8081? Because that’s the port we setup in the previous tutorial 😀. You know what? Why don’t you go ahead and open that article in another tab.
This now looks very similar to our previous server entry, except this time we’re listening on port 4002 and our upgrade headers are specifically tweaked for websocket support:
server {
    server_name ipfs.my-domain-name.com;

    listen [::]:4002 ssl ipv6only=on;
    listen 4002 ssl;

ssl_certificate /etc/letsencrypt/live/ipfs.my-domain-name.com/fullchain.pem;
    ssl_certificate_key /etc/letsencrypt/live/ipfs.my-domain-name.com/privkey.pem;
    include /etc/letsencrypt/options-ssl-nginx.conf;
    ssl_dhparam /etc/letsencrypt/ssl-dhparams.pem;

location / {
        proxy_pass http://127.0.0.1:8081;
        proxy_http_version 1.1;
        proxy_set_header Upgrade $http_upgrade;
        proxy_set_header Connection "upgrade";
    }
}
Your overall default Nginx configuration file should now look something like this:
You can now save, exit, and reload (sudo nginx -s reload) the config.
Wow, that was a lot of serious hacking… take a quick break, grab a coffee, and then let’s put the finishing touches on this super-powered IPFS peer node…
Stepping up our IPFS game
Back? Great, the final push is here. We’re going to enable a few nice IPFS features to help us connect to browser-based peer nodes. We’ll do this by enabling websocket support and relay hopping Swarm.EnableRelayHop via our IPFS repo's config command.
ipfs config Addresses.Swarm '["/ip4/0.0.0.0/tcp/4001", "/ip4/0.0.0.0/tcp/8081/ws", "/ip6/::/tcp/4001"]' --json
ipfs config --bool Swarm.EnableRelayHop true
Notice we’ve used 8081 as our websocket (ws) connection port, but left our regular tcp connection port as 4001. This is because we aren’t managing this port through our Nginx reverse proxy, so we can just let it pass through unchanged, whereas we want Nginx to manage our secure websocket support. Cool right?
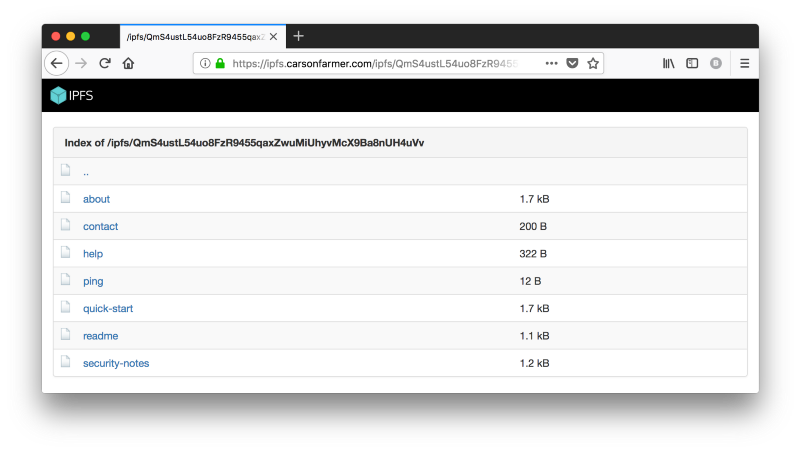
Ok, so let’s restart our IPFS daemon (sudo systemctl restart ipfs), and test things out. If you’ve enabled your secure gateway, go ahead and point your browser to https://ipfs.my-domain-name.com/ipfs/QmS4ustL54uo8FzR9455qaxZwuMiUhyvMcX9Ba8nUH4uVv. This should look very familiar to a screenshot from our previous post… except this time we have a nice green lock icon (using Firefox) to denote a secure connection!
But wait, there’s more. We can try to connect to our IPFS peer over secure websockets as well. Let’s give it a try. You can test a websocket connection quickly and easily using the simple web-app at websocket.org. In the Location field enter your domain name followed by port 4002, and click connect. You should get the CONNECTED message, followed by a Blob response.

And finally, you can make sure your other peer connection (swarm) port (4001) is open and accessible by checking if you have any connected peers. ipfs swarm peers should print out a long list of peer addresses that are currently communicating with your peer node. How cool is that?!
Recap and what’s next?
In our previous tutorial, we setup a basic IPFS peer node on an Amazon AWS EC2 instance. This time around, we built on top of that setup by setting up a firewall, installing and running an Nginx reverse proxy server, pointing our custom sub-domain to our EC2 instance, and enabling secure TLS/TCP connections by generating encryption keys via Let’s Encrypt. Along the way we’ve (maybe) enabled a public IPFS gateway, and setup our peer to support browser peers, relay hopping, and much more.
So what’s next? Well, for a modern production setup, you’d probably save your future self some pain by using a containerized orchestration solution (which we won’t cover here). And we’ve really only scratched the surface of the many features and configurations that IPFS supports. So join us for ta future post in this tutorial series to learn more about these cool features, what they mean, how they affect your peer node, and why you might (or might not) want to try them out.
In the mean time, why not check out some of our other stories, or sign up for our Textile Photos waitlist to see what we’re building with IPFS, or even drop us a line and tell us what cool distributed web projects you’re working on — we’d love to hear about it!