Begin transmission…
Bridging Between Filecoin and Ethereum using Axelar
Axelar Overview
Axelar is a proof-of-stake blockchain built using Cosmos SDK. It delivers cross-chain communication between various blockchain networks.
In this post, we will see a minimal example of cross-chain message passing between an EVM contract deployed on the Filecoin blockchain and the one deployed on Ethereum. Let's first look at how Axelar's bridging network works.

Source: Axelar docs
Bridge components
Gateways
The gateway contracts are deployed on each chain connected to the Axelar network. When a user initiates a cross-chain message, they first interact with a Gateway.
Incoming Relayers
Once a Gateway contract receives a message, it emits an event. Incoming relayers pick up the event and submit it to the Axelar network for processing.
Validator nodes
When Axelar validators receive the event sent by an external chain, they verify that it exists on the source chain and then vote to reach a consensus about its validity. The Gateway only allows actions on the external chain if the Axelar validators reach a consensus threshold.
Outgoing relayers
Like the incoming relayers, outgoing relayers monitor outgoing transaction queues containing cross-chain messages already approved and signed by the validators and periodically submit these transactions to external chains.
Gas Payment
Although a cross-chain transaction touches at least three different chains, thanks to the Gas Receiver contract, the gas can be paid with the native tokens of the source chain.
To provide a developer-friendly experience, Axelar deploys a Gas Receiver contract to all connected EVM chains. Under the hood, the Gas Receiver estimates the total gas cost required across the source chain, Axelar network, and destination chain. It converts source-chain tokens into AXL, destination-chain tokens, and other required currencies.
Hence, in our example, we can pay for the entire transaction with tFIL.
Filecoin <> Ethereum Example
Start by importing the Axelar Solidity SDK in the source file. We will use three dependencies from the SDK: AxelarExecutable, IAxelarGateway, and IAxelarGasService. We will extend the AxelarExecutable contract and use it to send and receive cross-chain messages on respective chains.
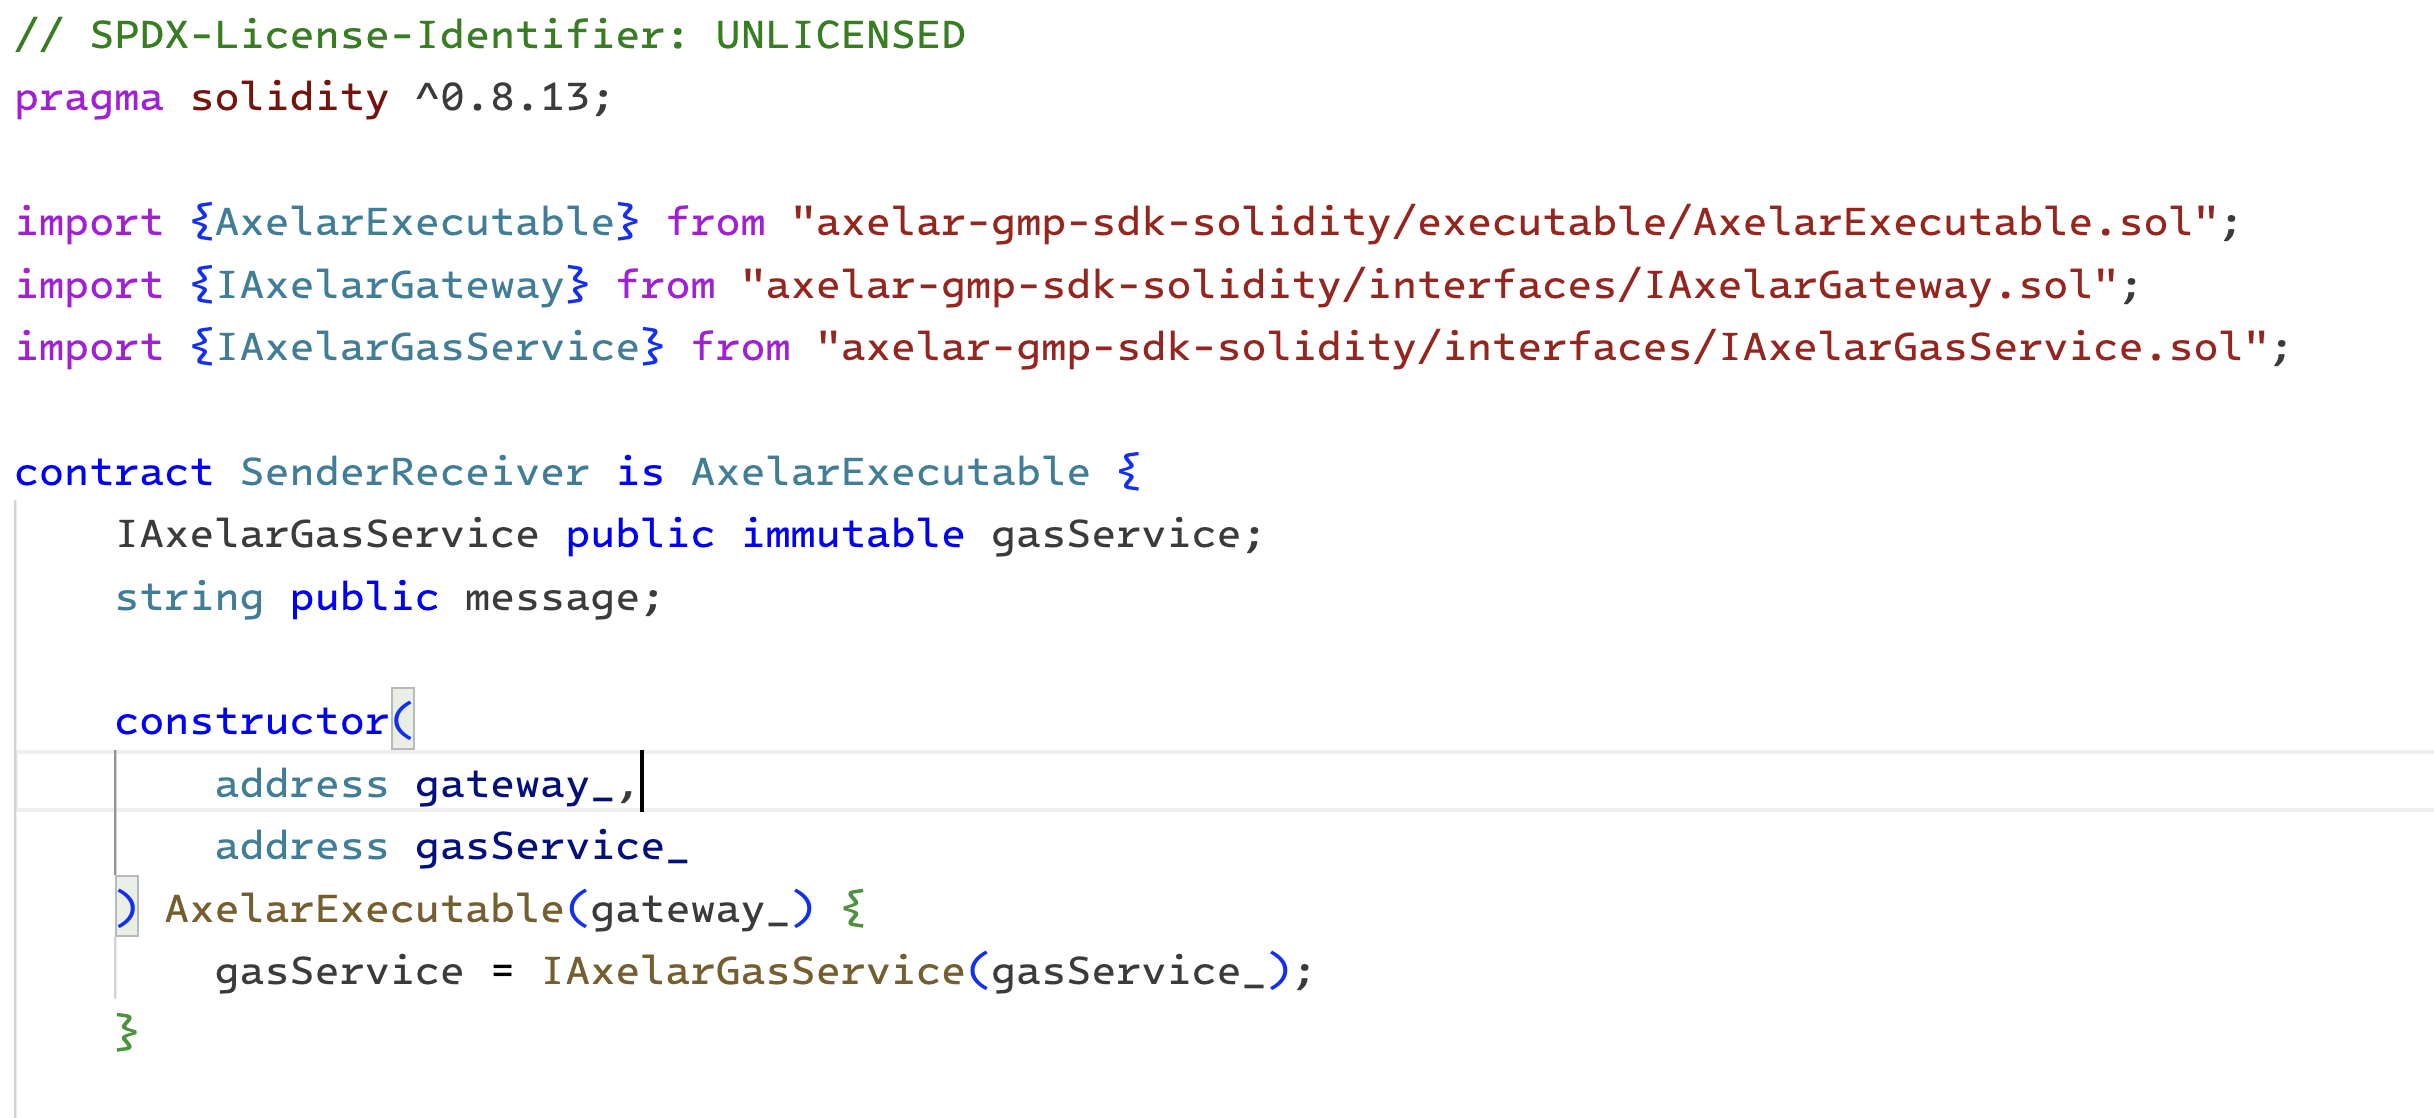
We must provide the address of the Gateway and the Gas Service in the constructor. Here is a list of available gateways and gas services contracts deployed on various supported networks.
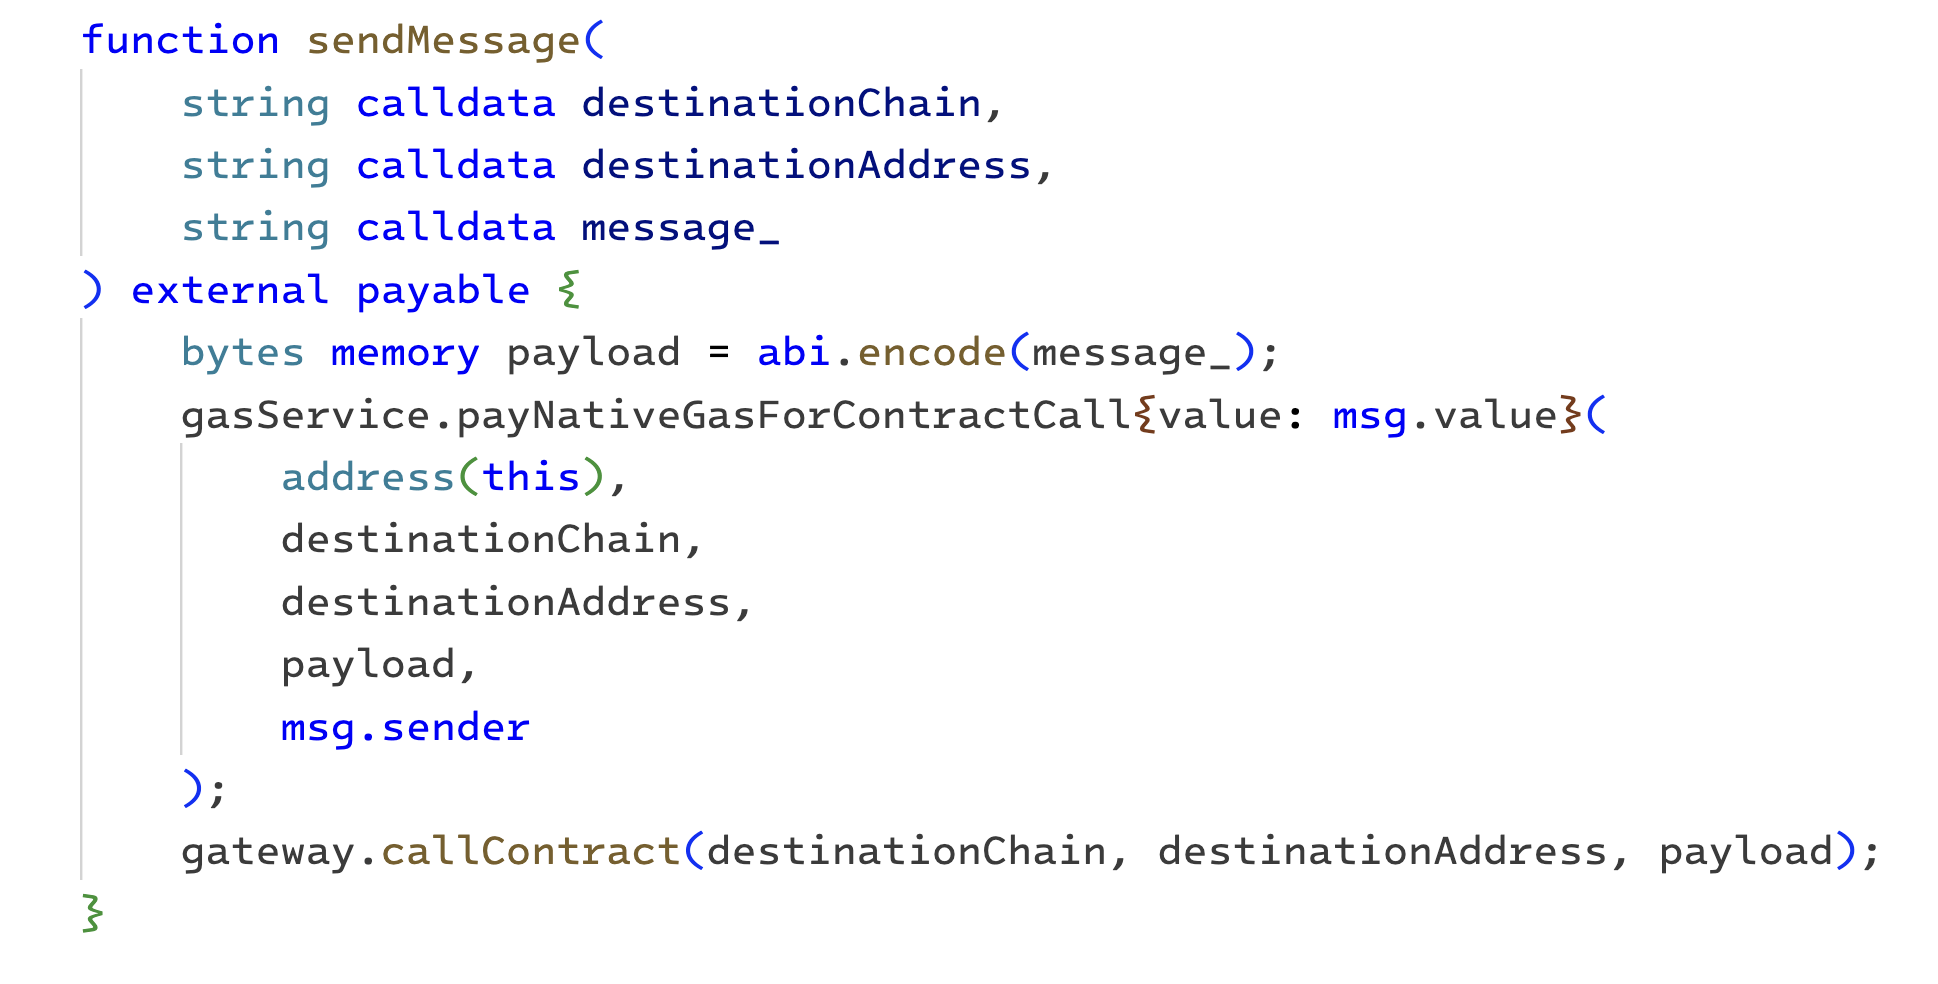
Next, we will add two more functions to our contract to implement a minimal cross-chain message flow. The function sendMessage will trigger a new cross-chain message. Along with the actual message, we will provide destinationChain and destinationAddress. Here is a list of supported destination chain names.
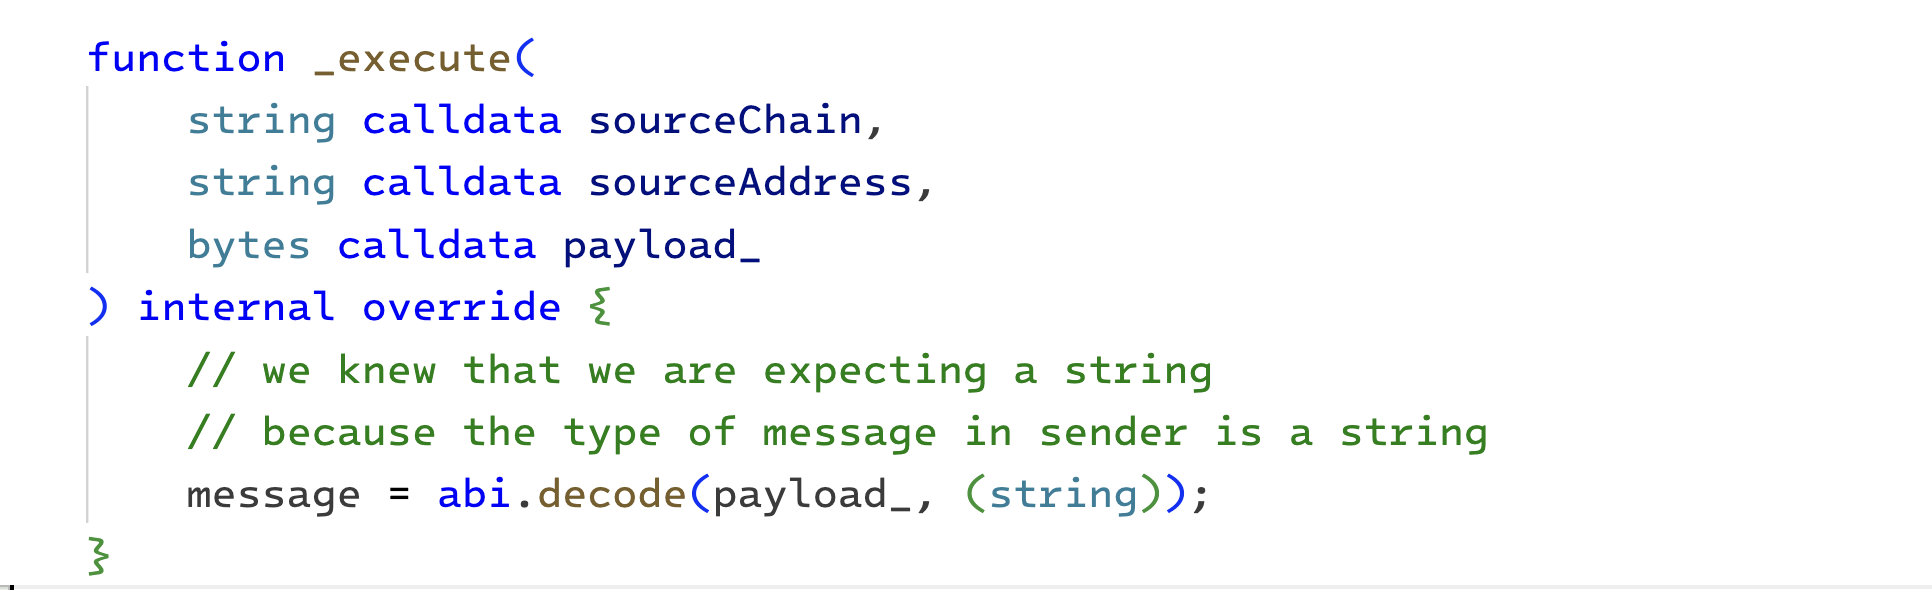
Lastly, we will add one more function: _execute. It will be used on the other side to receive the message. In addition to the message we sent, we will receive the sourceChain and sourceAddress.
We will deploy this contract on the Filecoin calibration testnet and Ethereum Sepolia to test our minimal cross-chain flow. Here is how to do it using Forge. Recall that the constructor arguments are Gateway and Gas Service contract addresses on the respective chains.
forge create --rpc-url "YOUR_RPC_URL" --private-key "YOUR_PRIVATE_KEY" --contracts src/SenderReceiver.sol SenderReceiver --constructor-args 0x999117D44220F33e0441fbAb2A5aDB8FF485c54D0xbE406F0189A0B4cf3A05C286473D23791Dd44Cc6
We can trigger the cross-chain message by calling the sendMessage function on the source chain. Finally, remember to abi.encode the actual message as a string.
cast send --private-key YOUR_PRIVATE_KEY --rpc-url YOUR_RPC_URL 0x6e80e2411E8afc76186A2f4955FBf037B95b25FE "sendMessage(string,string,string)" "ethereum-sepolia" "0x6e80e2411E8afc76186A2f4955FBf037B95b25FE" "0x0000000000000000000000000000000000000000000000000000000000000020000000000000000000000000000000000000000000000000000000000000001548656c6c6f2066726f6d20636f6e747261637420410000000000000000000000"
After you have successfully triggered a cross-chain message, you can monitor its status on axelarscan.
Building with Python + Tableland
by Dan Buchholz
The Tableland SDK is designed for JavaScript/TypeScript applications. For Python developers, there isn't a great way to get started. We'll be releasing some official docs to make it easier to set up a Tableland connection shortly, but we wanted to give devs a quick previous as to what they can do.
Calling the registry with web3.py
The most popular framework for working with blockchains is web3.py, so start by installing this package in your Python project: pip install web3.
You need the Tableland registry's ABI (TablelandTables.sol) to interact with the contract. The evm-tableland repo makes this easy with the following steps:
git clone <https://github.com/tablelandnetwork/evm-tableland> cd evm-tableland npm install npm run build cat artifacts/contracts/TablelandTables.sol/TablelandTables.json | jq '.abi' > abi.json
Now that we have the ABI, we can connect to the registry. There are two things we'll need:
A private key to sign transactions.
The provider of the chain's RPC provider.
The example below shows how you'd do this if you're connecting to Local Tableland with a Hardhat account:
# Define provider and private key provider_uri = "<http://localhost:8545>" private_key = "59c6995e998f97a5a0044966f0945389dc9e86dae88c7a8412f4603b6b78690d" # Set up web3 instance and signer w3 = Web3(Web3.HTTPProvider(provider_uri)) signer = Account.from_key(private_key)
We have the provider and signer. Thus, we can load the ABI and connect to the Tableland registry. If we're using Local Tableland, the registry address is 0xe7f1725e7734ce288f8367e1bb143e90bb3f0512:
from web3 import Web3 from eth_account import Account from eth_utils import to_checksum_address # Existing code... abi_file = "abi.json" # Path to the ABI file abi = read_file_to_json(abi_file) registry_addr = "0xe7f1725e7734ce288f8367e1bb143e90bb3f0512" registry = w3.eth.contract( address=to_checksum_address(registry_addr), abi=abi )
This is all we need to make onchain calls! We can execute both a CREATE TABLE and INSERT statement like so, and for each, we can parse the CreateTable or RunSQL event, respectively:
# Create a table table_prefix = "my_table" chain_id =. 31337 # E.g., for Local Tableland + Hardhat node tx_hash_create = registry.functions.create( signer.address, f"CREATE TABLE {table_prefix}_{chain_id} (id integer, val text)" ).transact() create_rec = w3.eth.wait_for_transaction_receipt(tx_hash_create) create_log = registry.events.CreateTable().process_receipt(create_rec) data = create_log[0] table_id = data["args"]["tableId"] # Write to it table_name = f"{table_prefix}_{chain_id}_{table_id}" tx_hash_mutate = self.registry.functions.mutate( signer.address, table_id, f"INSERT INTO {table_name} VALUES (1, 'hello')" ).transact({"from": signer.address}) mutate_rec = w3.eth.wait_for_transaction_receipt(tx_hash_mutate) mutate_log = registry.events.RunSQL().process_receipt(mutate_rec) data = mutate_log[0] transaction_hash = data["transactionHash"].hex()
Experimental Python SDK
There's an experimental Python SDK that can be used to interact with the Tableland registry. It's not officially supported (i.e., not an official Tableland package), but it's a good starting point for Python developers. One of the challenges with the approach above is that you also need to interact with the validator APIs to make sure onchain SQL is successfully materialized.
The [tableland](<https://github.com/dtbuchholz/tableland-py>) Python library handles this and makes it easier to get started. You can install by running the following command:
pip install tableland
You can import the library and set up the connection in a way that's similar to the official Tableland JavaScript SDK:
from tableland import Database private_key = "59c6995e998f97a5a0044966f0945389dc9e86dae88c7a8412f4603b6b78690d" # Replace with your private key db = Database( private_key=private_key, provider_uri="<http://localhost:8545>", # Replace with your RPC provider URL )
Creating a table includes the registry contract call as shown in the walkthrough above, but it also handles waiting for the validator to materialize the SQL and includes error messages in case of syntax issues:
# Create a new table statement = "create table my_table (id int, val text)" create_event = db.create(statement) table_name = create_event["table_name"] table_id = create_event["table_id"] # Check if there are any errors if create_event["error"] is not None: print(f"Error: {create_event['error']}")
Once a table is created, writing to it is straightforward and follows a similar pattern.
# Insert a row into the table statement = f"insert into {table_name} (id, val) values (1, 'hello')" write_event = db.write(statement) # Check if there are any errors if write_event["error"] is not None: print(f"Error: {write_event['error']}")
Lastly, the read method lets you write arbitrary SQL statements to query the table:
# Query the table statement = f"select * from {table_name}" data = db.read(statement) print(data) # [{'id': 1, 'val': 'hello'}]
If you're interested in contributing to the library, you can find the source code on GitHub.
Going dark
by Jim Kosem
Colour can count for a lot. Recently with Tableland Studio we’ve been piloting a dark mode colour scheme. This is a bigger deal than you probably think and the history of dark mode is an interesting one. We’ve been working with the idea coming from the angle of Studio being a developer tool, and especially as such, it works first in CLI, and then we bring it to the GUI. This actually matches up with the origin story of dark mode, which was in early UI designs for text-based terminals.
Way back when, actually turning on a pixel had computing and energy costs that were comparatively significant. So, it was cheaper to just turn on the ones you needed, which at the time, were for text. Then, as early Windows-based interfaces came to the scene, the thinking was that it should remind all these people new to using computers of paper. So, it all went white. That's simple, really. There are, of course, other issues in terms of glare and spending long amounts of time reading screens, where dark mode may help, but we’re thinking about the aesthetics and our origin in terminals and paying a bit of homage to that.
Other updates this week
Current hackathons coming to an end
We’ve been sponsoring the Filecoin Data Economy and the LearnWeb3 Decentralized Intelligence hackathons. Projects have made their final submissions, and we’ll be judging and deciding on winners by the end of the week. Check out next week’s post for more details on those projects!
End transmission…
Want to dive deeper, ask questions, or just nerd out with us? Jump into our Telegram or Discord—including weekly research office hours or developer office hours. And if you’d like to discuss any of these topics in more detail, comment on the issue over in GitHub!
Are you enjoying Weeknotes? We’d love your feedback—if you fill out a quick survey, we’ll be sure to reach out directly with community initiatives in the future!: Fill out the form here
